Gluten-Free Chocolate Chip Cookies – Gooey & Delicious
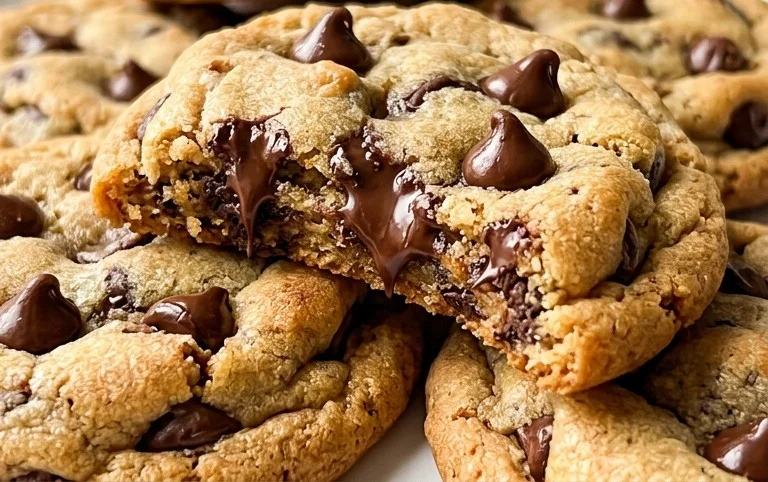
Gluten Free Chocolate Chip Cookies are more than just a treat; they are a doorway to pure, unadulterated joy. For so many of us, the scent of warm, melting chocolate chips mingling with buttery dough is synonymous with comfort, nostalgia, and happy memories. Whether you’re baking for yourself, loved ones, or guests with dietary needs, a perfectly baked gluten free chocolate chip cookie is a universal symbol of sweetness and care. What makes these particularly special is their ability to deliver that classic, irresistible chewy texture and rich chocolatey burst without a hint of gluten. It’s a delightful paradox, a cookie that satisfies every craving while accommodating specific dietary requirements. We’ve perfected a recipe that ensures these gluten free chocolate chip cookies are indistinguishable from their traditional counterparts, proving that deliciousness knows no bounds.

Gluten Free Chocolate Chip Cookies
There’s something truly magical about a warm, gooey chocolate chip cookie. For those of us navigating the world of gluten-free baking, this magic can sometimes feel a little elusive. But fear not! I’ve spent a lot of time perfecting a recipe that delivers all the comforting goodness of a classic chocolate chip cookie, without a hint of gluten. This recipe is my go-to, and I’m thrilled to share it with you. These cookies boast a delightful chewiness, rich chocolatey bursts, and a hint of caramel from the brown sugars. They’re surprisingly simple to make, making them perfect for a weekend baking project or a spontaneous treat.
Ingredients:
- 1/2 cup butter (regular or dairy-free), softened
- 1/3 cup granulated sugar
- 1/3 cup light brown sugar, packed
- 1/3 cup dark brown sugar, packed
- 1 large egg, at room temperature
- 2 teaspoons vanilla extract
- 1 1/2 cups Bob’s Red Mill GF 1:1 Baking Flour (the blue bag)
- 1/2 teaspoon baking soda
- 1/4 teaspoon baking powder
- 1/4 teaspoon salt
- 1 cup chocolate chips (your favorite kind – semi-sweet, dark, or milk chocolate work wonderfully)
Cookie Creation: Step-by-Step
Let’s get baking! The key to these delicious gluten-free cookies is the right flour blend and a bit of patience during the creaming and chilling stages.
1. Cream the Butter and Sugars: In a large mixing bowl, cream together the softened butter, granulated sugar, light brown sugar, and dark brown sugar. I like to use an electric mixer for this, starting on low speed and gradually increasing to medium. You want to beat them until the mixture is light, fluffy, and pale in color. This process incorporates air into the dough, which is crucial for the cookie’s texture. Don’t rush this step; it can take about 3-5 minutes. The different types of brown sugar contribute to both the chewiness and the depth of flavor, so don’t skimp on them! If you’re using dairy-free butter, ensure it’s softened to the right consistency, not melted.
2. Incorporate Wet Ingredients: Add the room-temperature egg and the vanilla extract to the creamed butter and sugar mixture. Beat again on medium speed until everything is well combined and smooth. It might look a little glossy. The room-temperature egg is important because it emulsifies better with the fats, creating a more cohesive dough. If your egg is cold, you can quickly place it in a bowl of warm (not hot) water for a few minutes to bring it up to temperature.
3. Whisk Dry Ingredients: In a separate medium bowl, whisk together the Bob’s Red Mill GF 1:1 Baking Flour, baking soda, baking powder, and salt. Whisking ensures that the leavening agents and salt are evenly distributed throughout the flour, preventing pockets of salty or flat cookies. Bob’s Red Mill 1:1 flour is specifically designed to mimic the performance of all-purpose wheat flour in gluten-free baking, which is why it’s a fantastic choice for this recipe.
4. Combine Wet and Dry Mixtures: Gradually add the dry ingredients to the wet ingredients. Mix on low speed until just combined. Be careful not to overmix the dough at this stage. Overmixing gluten-free dough can sometimes lead to a tougher cookie, even though there’s no gluten present. You’ll know it’s ready when you no longer see streaks of dry flour.
5. Fold in Chocolate Chips and Chill: Gently fold in the chocolate chips using a spatula or wooden spoon until they are evenly distributed throughout the dough. Now, this next step is crucial for the best texture and flavor development: chill the dough! Cover the bowl tightly with plastic wrap and refrigerate for at least 30 minutes, or ideally for 1-2 hours. Chilling the dough allows the gluten-free flour to hydrate properly, which improves the texture, and it also solidifies the butter, preventing the cookies from spreading too much during baking. This results in thicker, chewier cookies. You can even chill it overnight for an even deeper flavor.
6. Prepare for Baking and Bake: Preheat your oven to 350°F (175°C). Line baking sheets with parchment paper. This prevents sticking and makes for easy cleanup. Scoop rounded tablespoons of the chilled dough onto the prepared baking sheets, leaving about 2 inches between each cookie to allow for spreading. If you want slightly flatter cookies, you can gently press down on the dough balls before baking. Bake for 9-12 minutes, or until the edges are lightly golden brown and the centers still look slightly soft. They will continue to set up as they cool.
7. Cool and Enjoy: Allow the cookies to cool on the baking sheet for 5-10 minutes before transferring them to a wire rack to cool completely. This cooling period on the baking sheet is essential for the cookies to firm up without becoming brittle. Once they’ve cooled, grab a glass of milk (or your favorite beverage) and savor the incredible taste of your homemade, gluten-free chocolate chip cookies! They are best enjoyed fresh but will keep in an airtight container at room temperature for up to 3 days.
Conclusion:
You’ve made it to the end of our journey to perfect Gluten Free Chocolate Chip Cookies! I hope you’re as excited as I am to get baking. This recipe truly is a winner because it delivers all the chewy, chocolatey goodness you crave, without a trace of gluten. We’ve focused on creating a texture that’s both tender and slightly crisp around the edges, ensuring each bite is an absolute delight. They are incredibly versatile, perfect for a simple afternoon treat, a special occasion dessert, or even a thoughtful homemade gift. Don’t hesitate to get creative with your additions; think nuts, different types of chocolate chips, or even a sprinkle of sea salt on top for an extra flavor boost. I truly encourage you to give these a try – you might just find your new go-to gluten-free cookie recipe!
Frequently Asked Questions:
Can I use a different gluten-free flour blend?
Yes, you can! While this blend is optimized for texture and flavor, most 1:1 gluten-free baking blends should work. Keep in mind that the final texture might vary slightly depending on the specific flour composition. It’s always a good idea to measure your flour accurately by weight if possible.
How should I store these gluten-free chocolate chip cookies?
For the best taste and texture, store your cookies in an airtight container at room temperature. They should stay wonderfully soft and chewy for up to 3-4 days. If you want to enjoy them for longer, you can freeze baked cookies for up to 2 months. Simply thaw them at room temperature when you’re ready to indulge.
Gluten Free Chocolate Chip Cookies
Classic, chewy gluten-free chocolate chip cookies made with Bob’s Red Mill GF 1:1 Baking Flour.
Ingredients
-
1/2 cup butter (regular or dairy free)
-
1/3 cup granulated sugar
-
1/3 cup light brown sugar
-
1/3 cup dark brown sugar
-
1 large egg (room temperature)
-
2 teaspoons vanilla extract
-
1 1/2 cups Bob’s Red Mill GF 1:1 Baking Flour (Blue Bag)
-
1/2 teaspoon baking soda
-
1/4 teaspoon baking powder
-
1/4 teaspoon salt
-
1 cup chocolate chips
Instructions
-
Step 1
Preheat oven to 375°F (190°C). Line baking sheets with parchment paper. -
Step 2
In a large bowl, cream together the butter and sugars until light and fluffy. -
Step 3
Beat in the egg and vanilla extract until well combined. -
Step 4
In a separate medium bowl, whisk together the Bob’s Red Mill GF 1:1 Baking Flour, baking soda, baking powder, and salt. -
Step 5
Gradually add the dry ingredients to the wet ingredients, mixing until just combined. Do not overmix. -
Step 6
Stir in the chocolate chips. -
Step 7
Drop rounded tablespoons of dough onto the prepared baking sheets, about 2 inches apart. -
Step 8
Bake for 9-11 minutes, or until the edges are golden brown and the centers are still slightly soft. -
Step 9
Let the cookies cool on the baking sheets for a few minutes before transferring them to a wire rack to cool completely.
Important Information
Nutrition Facts (Per Serving)
It is important to consider this information as approximate and not to use it as definitive health advice.
Allergy Information
Please check ingredients for potential allergens and consult a health professional if in doubt.


