Easy Smores Cookie Bars Gooey Chocolate Marshmallow Treat
S’mores Cookie Bars are the ultimate campfire treat, reimagined into an effortlessly delicious dessert that you can enjoy anytime, anywhere. Forget fumbling with sticks and flickering flames; these incredible s’mores cookie bars bring all the nostalgic joy of a perfectly toasted marshmallow, gooey chocolate, and crumbly graham cracker right to your kitchen. What is it about s’mores that captivates us? Perhaps it’s the irresistible combination of textures and flavors – the slight char of the marshmallow, the rich melt of the chocolate, and the buttery crunch of the graham cracker. But these s’mores cookie bars take it a step further, creating a portable, shareable, and utterly satisfying bar that’s even easier to devour. They’re the perfect balance of chewy, gooey, and crunchy, making them an instant crowd-pleaser for potlucks, game nights, or just a cozy evening in.
Get ready to fall in love with this delightful twist on a classic.
Let’s bake some magic!
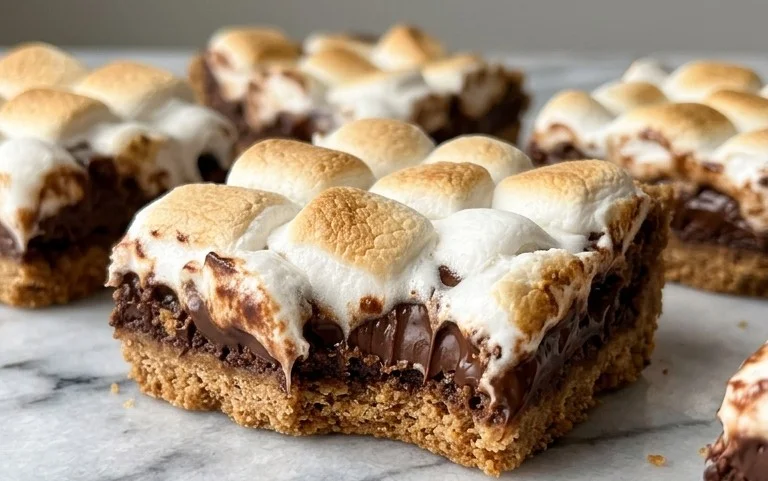
S’mores Cookie Bars
Get ready to elevate your s’mores game with these irresistible S’mores Cookie Bars! Forget struggling with campfire flames and sticky fingers; these bars deliver all the gooey, chocolatey, marshmallowy goodness of a s’more in a perfectly portable, bake-able treat. They’re incredibly easy to make, making them a fantastic option for bake sales, potlucks, or just a seriously satisfying dessert for a cozy night in. The secret is a chewy, buttery cookie base topped with a layer of melted chocolate and toasted marshmallows. Let’s get baking!
Ingredients:
- 7-8 graham crackers ((full sheets/unbroken rectangles))
- 1 cup unsalted butter ((2 sticks) room temperature)
- ¾ cup granulated sugar
- ¾ cup light brown sugar (gently packed)
- 2 large eggs
- 2 tsp vanilla extract
- 3 cups all-purpose flour ((stir, spoon, & level))
- ¾ tsp salt
- ¾ tsp baking soda
- ½ cup semi-sweet chocolate chips
- 1 cup mini marshmallows
- 2 regular sized Hershey’s Milk Chocolate Bars ((two 1.55oz/43g bars) broken into squares)
Cookie Bar Preparation
The foundation of these amazing bars is a wonderfully chewy, slightly crisp cookie base. We’re starting by preparing our graham cracker layer. This might seem a little unusual for a cookie bar, but trust me, it’s the key to that authentic s’mores flavor!
1. **Preheat and Prep Your Pan:** First things first, preheat your oven to 350°F (175°C). Now, grab a 9×13 inch baking pan. To ensure your bars come out cleanly and easily, generously grease the pan with butter or non-stick cooking spray. For an extra layer of insurance, you can also line the pan with parchment paper, leaving a slight overhang on the sides. This parchment sling will make lifting the entire baked slab out of the pan a breeze, which is super helpful when you’re ready to cut them.
2. **Create the Graham Cracker Crust:** Take your graham crackers and crush them into fine crumbs. You can do this by placing them in a zip-top bag and using a rolling pin, or pulse them in a food processor until they resemble coarse sand. Once crumbled, press about half of the graham cracker crumbs evenly into the bottom of your prepared baking pan. This layer will get slightly toasted and form a delicious base that complements the cookie dough beautifully. Reserve the remaining graham cracker crumbs for later.
3. **Cream the Butter and Sugars:** In a large mixing bowl, or the bowl of your stand mixer fitted with the paddle attachment, cream together the room temperature unsalted butter, granulated sugar, and light brown sugar. Beat them on medium speed until the mixture is light, fluffy, and pale in color. This usually takes about 3-5 minutes. This step is crucial for incorporating air into the dough, which contributes to the texture of your cookie bars. Scrape down the sides of the bowl occasionally to ensure everything is well combined.
4. **Add Wet Ingredients and Mix:** Now, it’s time to add the eggs, one at a time, beating well after each addition until fully incorporated. Then, stir in the vanilla extract. Make sure your eggs are at room temperature; this helps them emulsify better with the butter and sugar mixture, resulting in a smoother dough.
5. **Combine Dry Ingredients and Mix into Dough:** In a separate medium bowl, whisk together the all-purpose flour, salt, and baking soda. Gradually add this dry ingredient mixture to the wet ingredients in the large bowl, mixing on low speed until just combined. Be careful not to overmix the dough at this stage; overmixing can lead to tough cookie bars. You want to see just a few streaks of flour remaining before proceeding.
6. **Assemble the Cookie Bar Layers:** Now for the fun part! Reserve about 1 cup of the cookie dough and set it aside. Spread the remaining cookie dough evenly into the prepared baking pan, over the graham cracker layer. Don’t worry if it’s not perfectly smooth; you can gently press it down with your hands or a spatula. Sprinkle the semi-sweet chocolate chips evenly over this layer of cookie dough. Next, distribute the broken Hershey’s chocolate bar squares over the chocolate chips. Finally, dot the top of everything with the mini marshmallows and sprinkle the remaining graham cracker crumbs over the marshmallows. The reserved cookie dough can be crumbled and sprinkled over the top to create a more traditional cookie-like texture.
7. **Bake to Golden Perfection:** Place the pan in your preheated oven and bake for 25-35 minutes, or until the cookie bars are golden brown around the edges and the marshmallows are puffy and slightly golden. Keep a close eye on them, especially during the last 10 minutes, as the marshmallows can go from perfectly toasted to burnt very quickly. The center might still look slightly soft, but it will continue to set as it cools.
8. **Cool and Cut:** Once baked, remove the pan from the oven and let the S’mores Cookie Bars cool completely in the pan on a wire rack. This is a crucial step! Trying to cut them while they are hot will result in a gooey mess. Patience is key here. Once they are completely cooled, use the parchment paper overhang to lift the entire slab out of the pan. Place it on a cutting board and use a sharp knife to cut them into squares. For cleaner cuts, you can even run your knife under hot water and dry it between cuts. Enjoy these delightful S’mores Cookie Bars!
Conclusion:
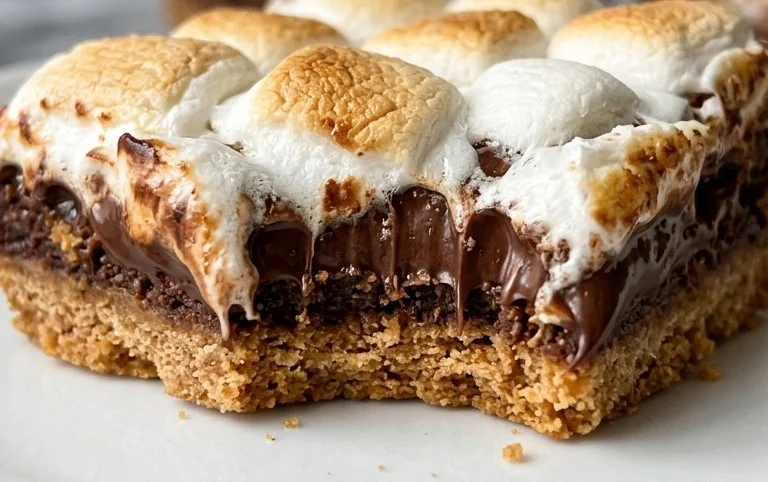
I hope you’re as excited as I am about these incredible S’mores Cookie Bars! They truly are the perfect blend of chewy cookie, gooey melted marshmallow, and rich chocolate – everything you love about s’mores, elevated into an easy-to-make bar. The simplicity of this recipe makes it a winner for any occasion, from casual backyard gatherings to potlucks and even holiday cookie exchanges. The base is a wonderfully buttery and soft cookie dough, providing the ideal foundation for the classic s’mores toppings. This recipe is incredibly versatile, allowing you to customize it to your heart’s content, making these S’mores Cookie Bars a crowd-pleaser every single time.
Serving these bars is a breeze. They’re fantastic on their own, but you can also serve them warm with a scoop of vanilla ice cream for an extra decadent treat. Consider adding a drizzle of caramel sauce or a sprinkle of sea salt to the finished bars for a gourmet touch. For variations, try using different types of chocolate chips, like dark chocolate or milk chocolate chunks. You could also incorporate a swirl of peanut butter into the cookie dough or sprinkle some crushed graham crackers on top before baking for an extra layer of texture and flavor. I wholeheartedly encourage you to give this S’mores Cookie Bar recipe a try. I promise you won’t be disappointed; they’re utterly delicious!
Frequently Asked Questions:
Can I make these S’mores Cookie Bars ahead of time?
Absolutely! These S’mores Cookie Bars are perfect for making ahead. Once cooled completely, store them in an airtight container at room temperature for up to 3 days. They might even be better on the second day as the flavors meld together!
How do I prevent the marshmallows from burning?
A common concern! The key is to watch them closely during the last few minutes of baking. If they start to brown too quickly, you can tent the pan loosely with aluminum foil for the remaining baking time. Alternatively, you can toast your marshmallows separately under the broiler for a minute or two just before serving and place them on top of the warm bars.
What is the best way to store leftovers?
For the best quality, store any leftover S’mores Cookie Bars in an airtight container at room temperature. This will help keep the cookie base soft and chewy and prevent the chocolate and marshmallows from becoming too hard.
S’mores Cookie Bars
A delicious and easy recipe for s’mores cookie bars, combining the classic flavors of graham crackers, chocolate, and marshmallows in a convenient bar form.
Ingredients
-
7-8 graham crackers ((full sheets/unbroken rectangles))
-
1 cup unsalted butter ((2 sticks) room temperature)
-
¾ cup granulated sugar
-
¾ cup light brown sugar (gently packed)
-
2 large eggs
-
2 tsp vanilla extract
-
3 cups all-purpose flour ((stir, spoon, & level))
-
¾ tsp salt
-
¾ tsp baking soda
-
½ cup semi-sweet chocolate chips
-
1 cup mini marshmallows
-
2 regular sized Hershey’s Milk Chocolate Bars ((two 1.55oz/43g bars) broken into squares)
Instructions
-
Step 1
Preheat oven to 350°F (175°C). Line a 9×13 inch baking pan with parchment paper, leaving an overhang on the sides. -
Step 2
Crush the graham crackers into fine crumbs. Mix with 2 tablespoons of the softened butter and press evenly into the bottom of the prepared baking pan. Bake for 8-10 minutes until lightly golden. Let cool slightly. -
Step 3
In a large bowl, cream together the remaining unsalted butter, granulated sugar, and brown sugar until light and fluffy. -
Step 4
Beat in the eggs one at a time, then stir in the vanilla extract. -
Step 5
In a separate bowl, whisk together the all-purpose flour, salt, and baking soda. Gradually add the dry ingredients to the wet ingredients, mixing until just combined. -
Step 6
Spread half of the cookie dough evenly over the baked graham cracker crust. Sprinkle with the semi-sweet chocolate chips and the broken Hershey’s Milk Chocolate Bar pieces. -
Step 7
Dollop the remaining cookie dough over the chocolate layers. Finally, sprinkle the mini marshmallows evenly over the top. -
Step 8
Bake for 20-25 minutes, or until the cookie bars are golden brown and the marshmallows are toasted. The center might still appear slightly soft. -
Step 9
Let the bars cool completely in the pan on a wire rack before cutting into squares using the parchment paper overhang to lift them out. This is crucial for clean cuts.
Important Information
Nutrition Facts (Per Serving)
It is important to consider this information as approximate and not to use it as definitive health advice.
Allergy Information
Please check ingredients for potential allergens and consult a health professional if in doubt.


